
Russia


Step-by-Step Guide to Opening a Port on Windows Server
A complete step-by-step guide explaining how to open firewall ports on a Windows VPS or dedicated server for applications, game servers, websites, remote desktop tools, and custom software.
by Hamza
Why You Need to Open Ports on a Windows Server
Windows Firewall protects your server by blocking unauthorized incoming connections. However, some applications and services require specific ports to remain open so users or software can connect properly.
For example, you may need to open ports for:
- Web hosting servers
- Game servers
- Remote Desktop (RDP)
- VPN services
- Database connections
- FTP servers
- Custom software applications
If you are using a Windows VPS and need reliable performance for hosting applications and services, try our Windows VPS hosting at Retzor.
Quick Summary
- Connect to your Windows VPS using Remote Desktop.
- Open Windows Defender Firewall.
- Access Advanced Firewall Settings.
- Create a new inbound rule.
- Select TCP or UDP and enter the port number.
- Allow the connection and save the rule.
Before You Begin
Before opening a port on your Windows server, make sure:
- You have administrator access to the server.
- You know which port your application requires.
- You know whether the application uses TCP or UDP.
- Your VPS provider does not block the port externally.
Opening unnecessary ports may create security risks, so only allow ports that are actually needed.
Step 1 — Connect to Your Windows VPS via RDP
First, connect to your Windows server using Remote Desktop Protocol (RDP).
On Windows:
- Press Windows + R
- Type mstsc
- Click OK
- Enter your VPS IP address
- Log in using your administrator credentials
Once connected, you will have access to the Windows desktop environment.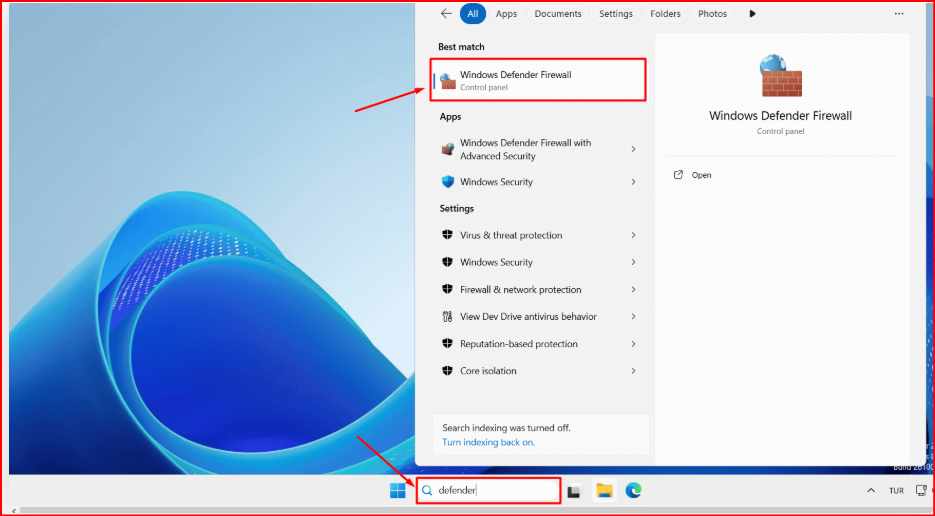
Step 2 — Open Windows Defender Firewall
Click the Start Menu and search for:
Windows Defender Firewall
Then click the Windows Defender Firewall application from the search results.
This tool manages all inbound and outbound traffic rules for your Windows server.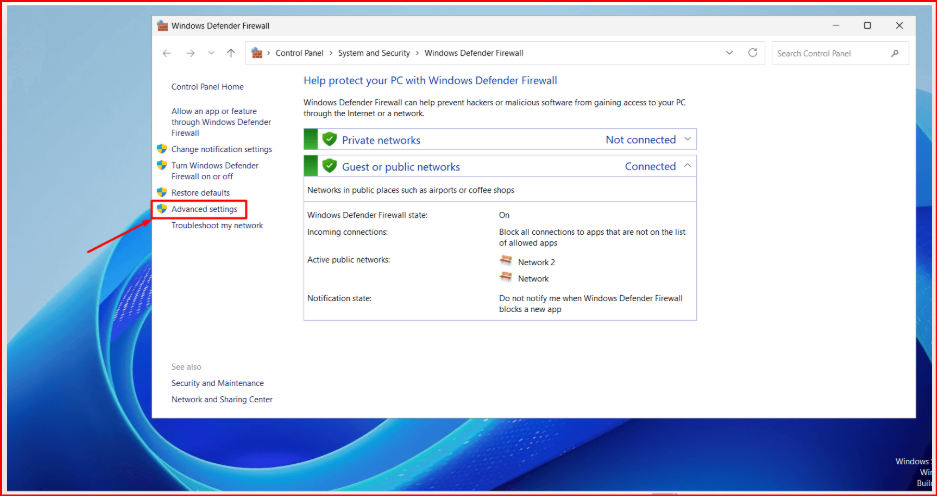
Step 3 — Open Advanced Firewall Settings
Inside Windows Defender Firewall, click:
Advanced Settings
This opens the advanced firewall management interface where you can create custom rules for specific ports and applications.
Step 4 — Create a New Inbound Rule 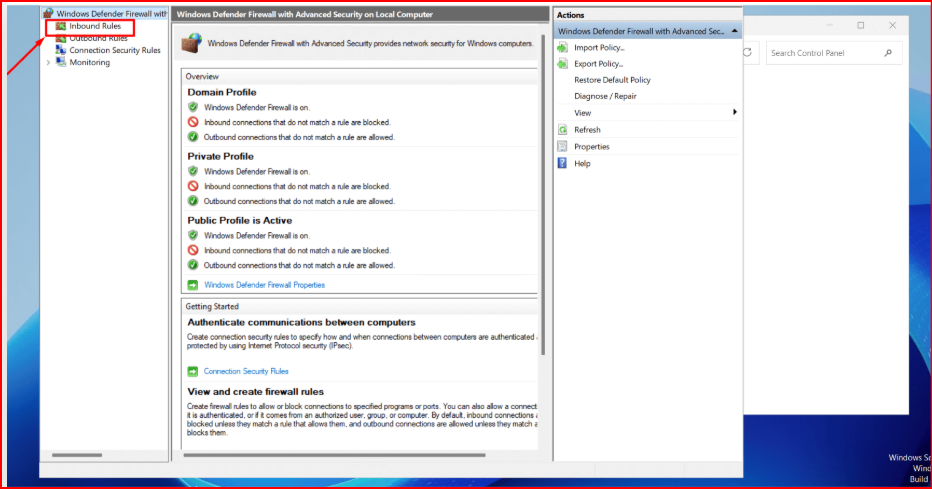
In the left menu, click:
Inbound Rules
Then, in the right-side Actions panel, click:
New Rule
This launches the firewall rule creation wizard.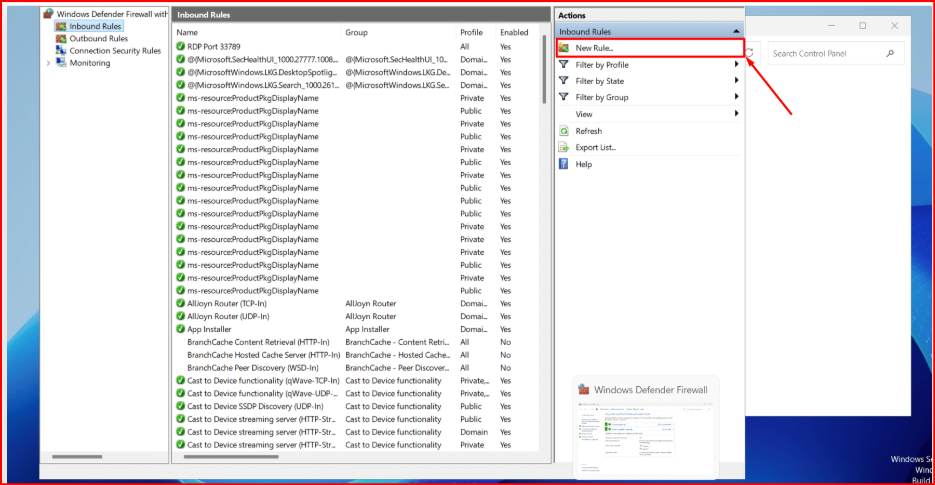
Step 5 — Select Port Rule Type
Choose:
Port
Then click the Next button.
This option allows you to open a specific TCP or UDP port manually.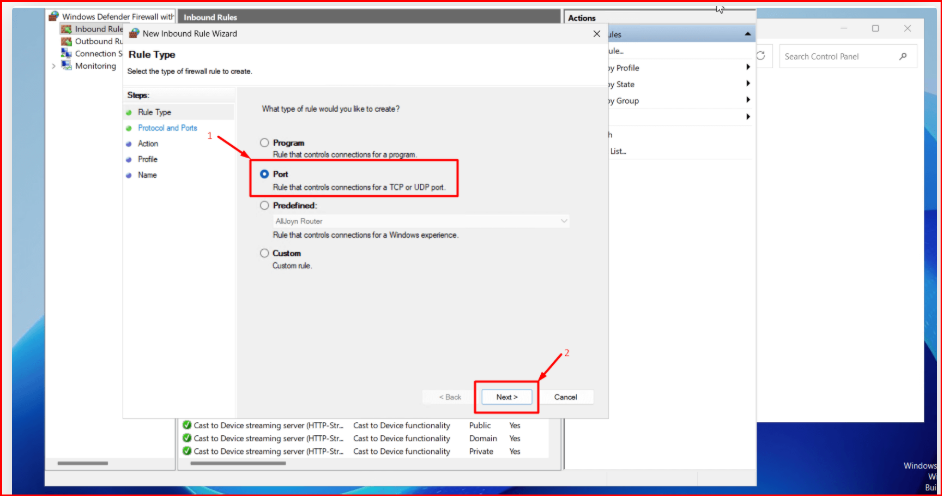
Step 6 — Choose TCP or UDP and Enter the Port Number
Most applications use TCP connections, but some services such as game servers or VPNs may require UDP.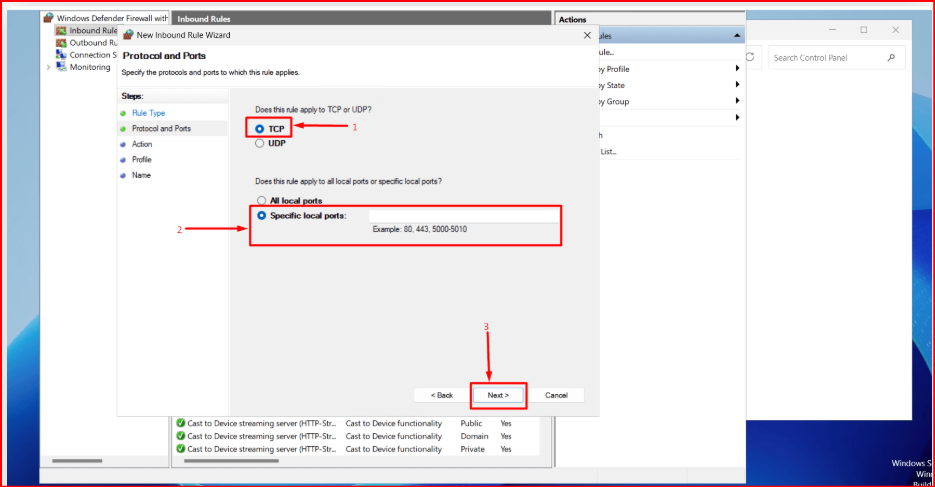
| Protocol | Common Uses |
|---|---|
| TCP | Websites, RDP, FTP, databases |
| UDP | Games, VoIP, VPNs, streaming |
Enter your port number inside:
Specific local ports
Example:
25565
If you want to open multiple ports, separate them with commas:
80,443,25565
Step 7 — Allow the Connection
On the next screen, select: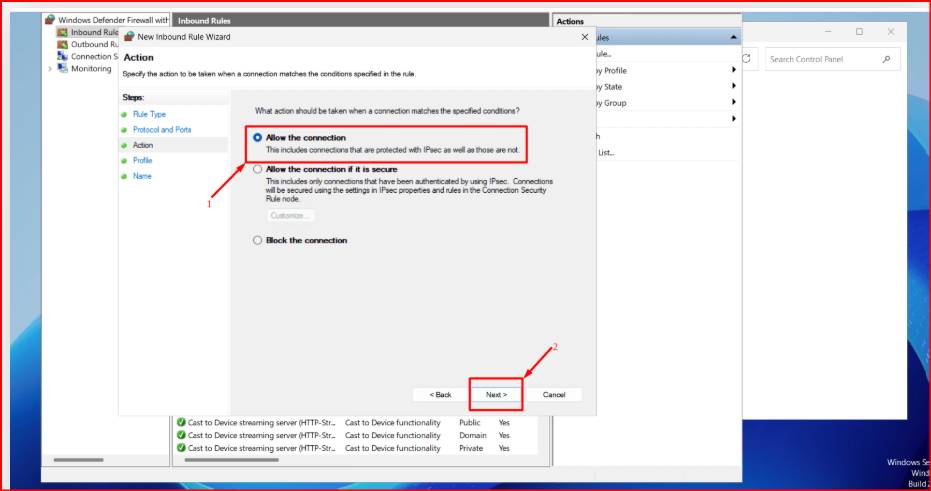
Allow the connection
This allows incoming traffic through the selected port.
Click Next to continue.
Step 8 — Select Firewall Profiles
You will now see three profile options:
- Domain
- Private
- Public
In most VPS environments, it is recommended to enable all three profiles unless you have a specific security requirement.
Click Next to continue.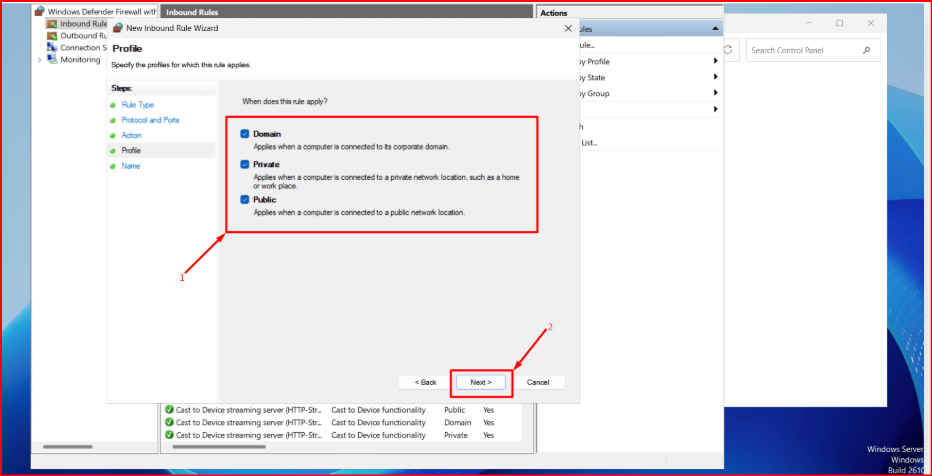
Step 9 — Name the Firewall Rule
Enter a descriptive name for the rule so you can easily identify it later.
Example:
Minecraft Server Port
You can optionally add a description explaining the purpose of the rule.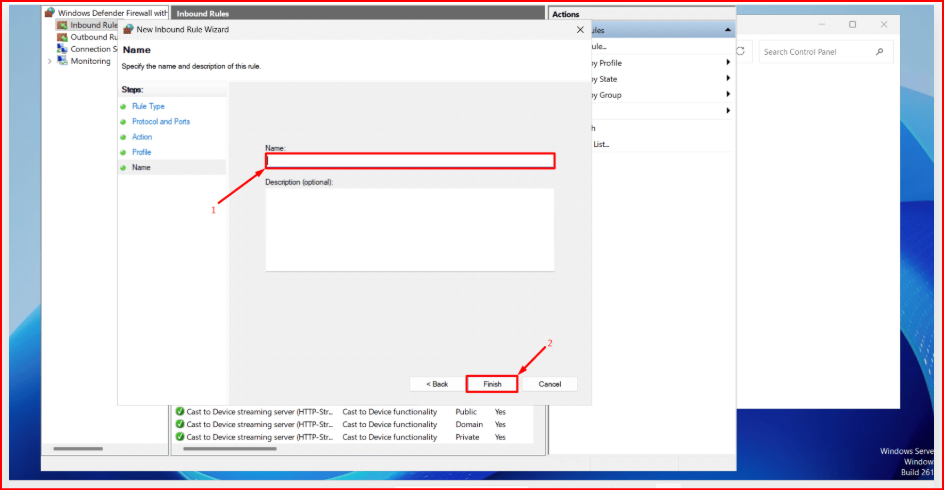
Finally, click:
Finish
How to Check if the Port Is Open
After creating the firewall rule, you can verify the port status using online port checking tools or PowerShell commands.
PowerShell example:
netstat -an
You can also use websites like:
https://www.yougetsignal.com/tools/open-ports/
Common Ports Used on Windows Servers
| Port | Purpose |
|---|---|
| 80 | HTTP Web Traffic |
| 443 | HTTPS Secure Web Traffic |
| 3389 | Remote Desktop Protocol (RDP) |
| 21 | FTP Server |
| 25565 | Minecraft Server |
| 1194 | OpenVPN |
Security Tips When Opening Ports
- Only open ports you actually need.
- Use strong passwords for all exposed services.
- Disable unused firewall rules.
- Regularly update your Windows server.
- Avoid exposing sensitive services publicly.
- Use DDoS protection when hosting public applications.
Leaving unnecessary ports open increases the attack surface of your server and may create security vulnerabilities.
Final Thoughts
Opening ports on a Windows server is essential for allowing applications, websites, game servers, and remote services to communicate properly over the internet.
By using Windows Defender Firewall advanced settings, you can safely create custom inbound rules for TCP or UDP traffic in just a few minutes.
Always remember to keep security in mind and avoid exposing unnecessary services publicly.
Need a powerful Windows VPS for hosting applications, game servers, or remote desktop environments? Try our Windows VPS hosting at Retzor with fast deployment and reliable performance.